Here's a simple example. Schools often store data within a structure like the one below, because it makes more sense when we are looking at it in a spreadsheet. We can look at and/or enter student scores over time, and we can see all of a single student's data in one row. Logical, right?
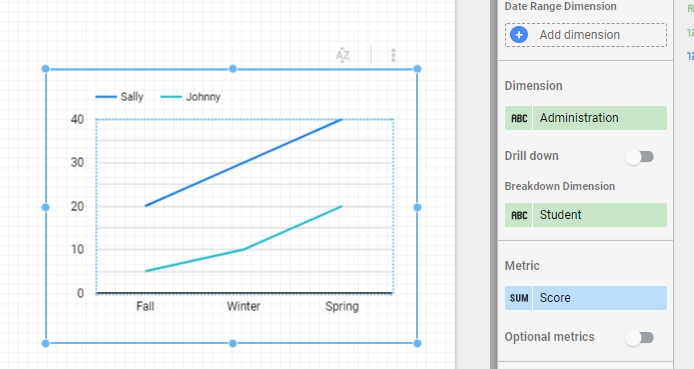
However, this type of structure may not allow us to display the data in a desired format, because you essentially have three sets of metrics for each student. Restructuring the data so that we have a dimension (Administration) and a metric (Score) can help, as in the example below.
This allows us to graph the data in a useful way:

I see a lot of Sheets where there is one tab (or Sheet) per school, grade level, classroom, etc. Data Studio wants to see your data in a single Sheet, with columns to identify school, grade level, classroom, etc. which will then allow you to filter the data by those criteria. You can use an IMPORTRANGE or QUERY formula to bring data together from multiple tabs or Sheets.
A few other tips for structuring data sources:
- If you're concerned your existing data needs some restructuring in order to work well with Data Studio, you can try taking a look at Ben Collins' approach for 'unpivoting' data in Sheets.
- Life is easier if your data source Sheet has a single header row in the first row of the Sheet. Merged cells or multi-row headers will need cleanup or workarounds in order to use them in Data Studio.
- Avoid summary rows, extra text on the sheet, and blank rows or columns (blank columns will not be brought as part of a data source even if they have a header).
- Cells should contain a single value where possible. I try to avoid 'check all that apply' type questions in a Google Form for this reason. I found this resource on CATA questions from Sheila B. Robinson very helpful.
- If you will want to do any sort of data blending with multiple sources, make sure your Sheet includes a column with some sort of unique identifier, such as student ID number.
Many of the CSV files we get from DESE here in Massachusetts work really well with Data Studio just the way they are. (Note: I always bring CSV files into Sheets rather than using the 'Upload CSV' data connector.) Raw exports from a district's student information system or assessment database also tend to work very well, even though they might be a challenge to wrap our heads around visually. Spreadsheets such as the one below are ugly, but Data Studio loves them!
Bottom line: If you are using a Google Sheet as a data source, don't try to to make it look pretty! Spend some time ensuring your Sheet is set up to play nicely with Data Studio and it will make all the difference. A single header row with data underneath is all you need.
No comments:
Post a Comment